Installing CUDA and CUDA toolkit on Ubuntu the right way
Problem
If you have a new Ubuntu/debian based system and are looking forward to installing CUDA and CUDA toolkit, you might have noticed that the installation process is not as straightforward as it might initially seem.
For the starter, don’t install CUDA toolkit via apt-get, that is a really bad way to do this. If you have installed CUDA toolkit via apt-get, you should uninstall it first by using apt-get remove nvidia-cuda-toolkit.
Solution
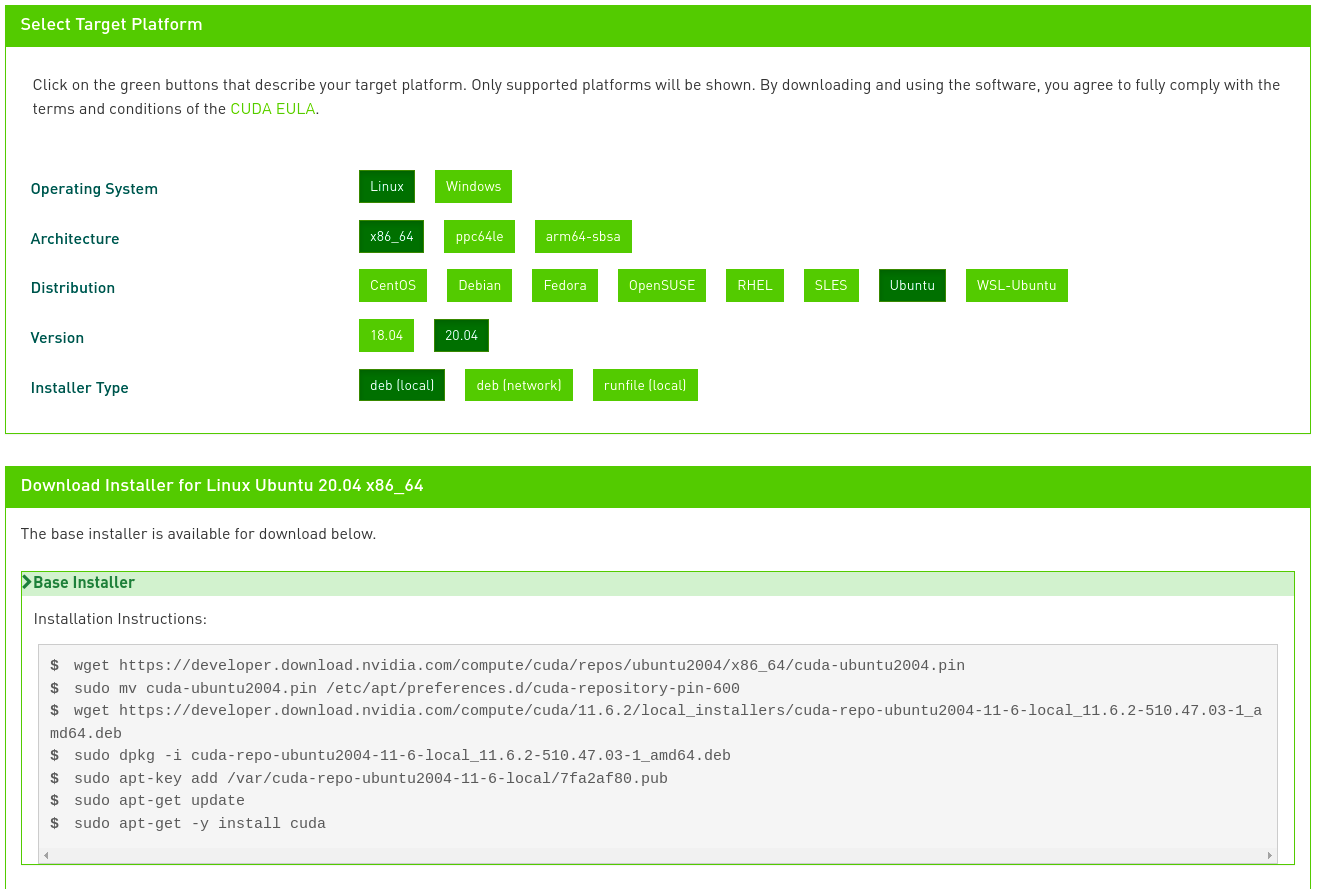
I am going to be giving the most straight-forward solution here. To start, go to NVIDIA CUDA downloads page here and choose the latest CUDA toolkit version based on your system.
When you have done that, you will see a small code snippet explaining how to install CUDA toolkit. Follow what it says, piece by piece.
For example, it might look something like this:

After you have followed all the instructions and installed CUDA successfully on your system, you can check it’s version using nvidia-smi command in terminal and on the upper right of the output you will see the version.
You are almost done except one last thing which is where I struggled the most since I didn’t know what to do exactly.
Now you have to add your cuda folder to your PATH environment variable. You can execute this command in your terminal/shell:
export PATH=/usr/local/cuda-11.6/bin${PATH:+:${PATH}}
In above snippet, replace cuda-11.6 with your cuda version. You can find that by going to /usr/local/cuda folder and looking at the folder name. If you have multiple folder, you can choose whichever version you want to use or just use the latest one.
That’s basically it! Now you can check if everything works by opening a terminal and typing this: nvcc --version
I hope this micro-article helped you out.